

We will keep this blog post quite straight forward, for in-depth details and explanation, please watch our above video instead.
Links referenced in the Video:
-Turn-Based RPG Template on Unity Assetstore:
https://assetstore.unity.com/packages/templates/systems/turnbase-rpg-template-107578
-PHP Webservice for the above template:
https://github.com/insthync/rpg-php-service
-Puttygen (to generate SSH keys):
https://www.puttygen.com/
-MobaXTerm (SSH Client, to connect to your server):
https://mobaxterm.mobatek.net/
-HeidiSQL (Desktop Client to manage your SQL database, preferred over PHPMYADMIN):
https://www.heidisql.com/
Creating the Cloud Server (instance)
Our cloud provider of choice is Scaleway (Elements), not just because they are cheaper, provide unmetered bandwidth traffic but also because they are the most easiest to use, specially their dashboard/panel.
The server we will use in this guide costs less than Euro 2 for 1GB Ram, 10GB SSD, 1 Core and a public IP with unmetered traffic.
All in all, they provide the most value for money and what we personally use for a lot of our projects.
DISCLAIMER: We are not sponsored or affiliated with them in any way.
Sign up for a account at Scaleway Elements

If not redirected automatically after account creation, login to their Console (Dashboard) here:

In the video, we went straight to creating our instance, but we first need to setup our SSH keys which we can assign and use during server creation.
SSH keys are like a two part file-based security system, where you provide one public file to the server and then use a private file while connecting to the server via SSH.
Its a better form of security system than plain-text password system and quite the standard when it comes to server security and access.
Download and open PuttyGen (link at top of this post).
Make sure type of key is set to SSH2-RSA2 and click generate. Move your mouse in the empty space to generate the key.
Then save the public key and private key separately (name them so you can recognize which is which).
There is one more step involved using Puttygen which we missed in the video. You need to convert your saved Private Key to OPENSSH format and re-save it again.
This OPENSSH format private key is what we will use in our SSH client to connect to our server.
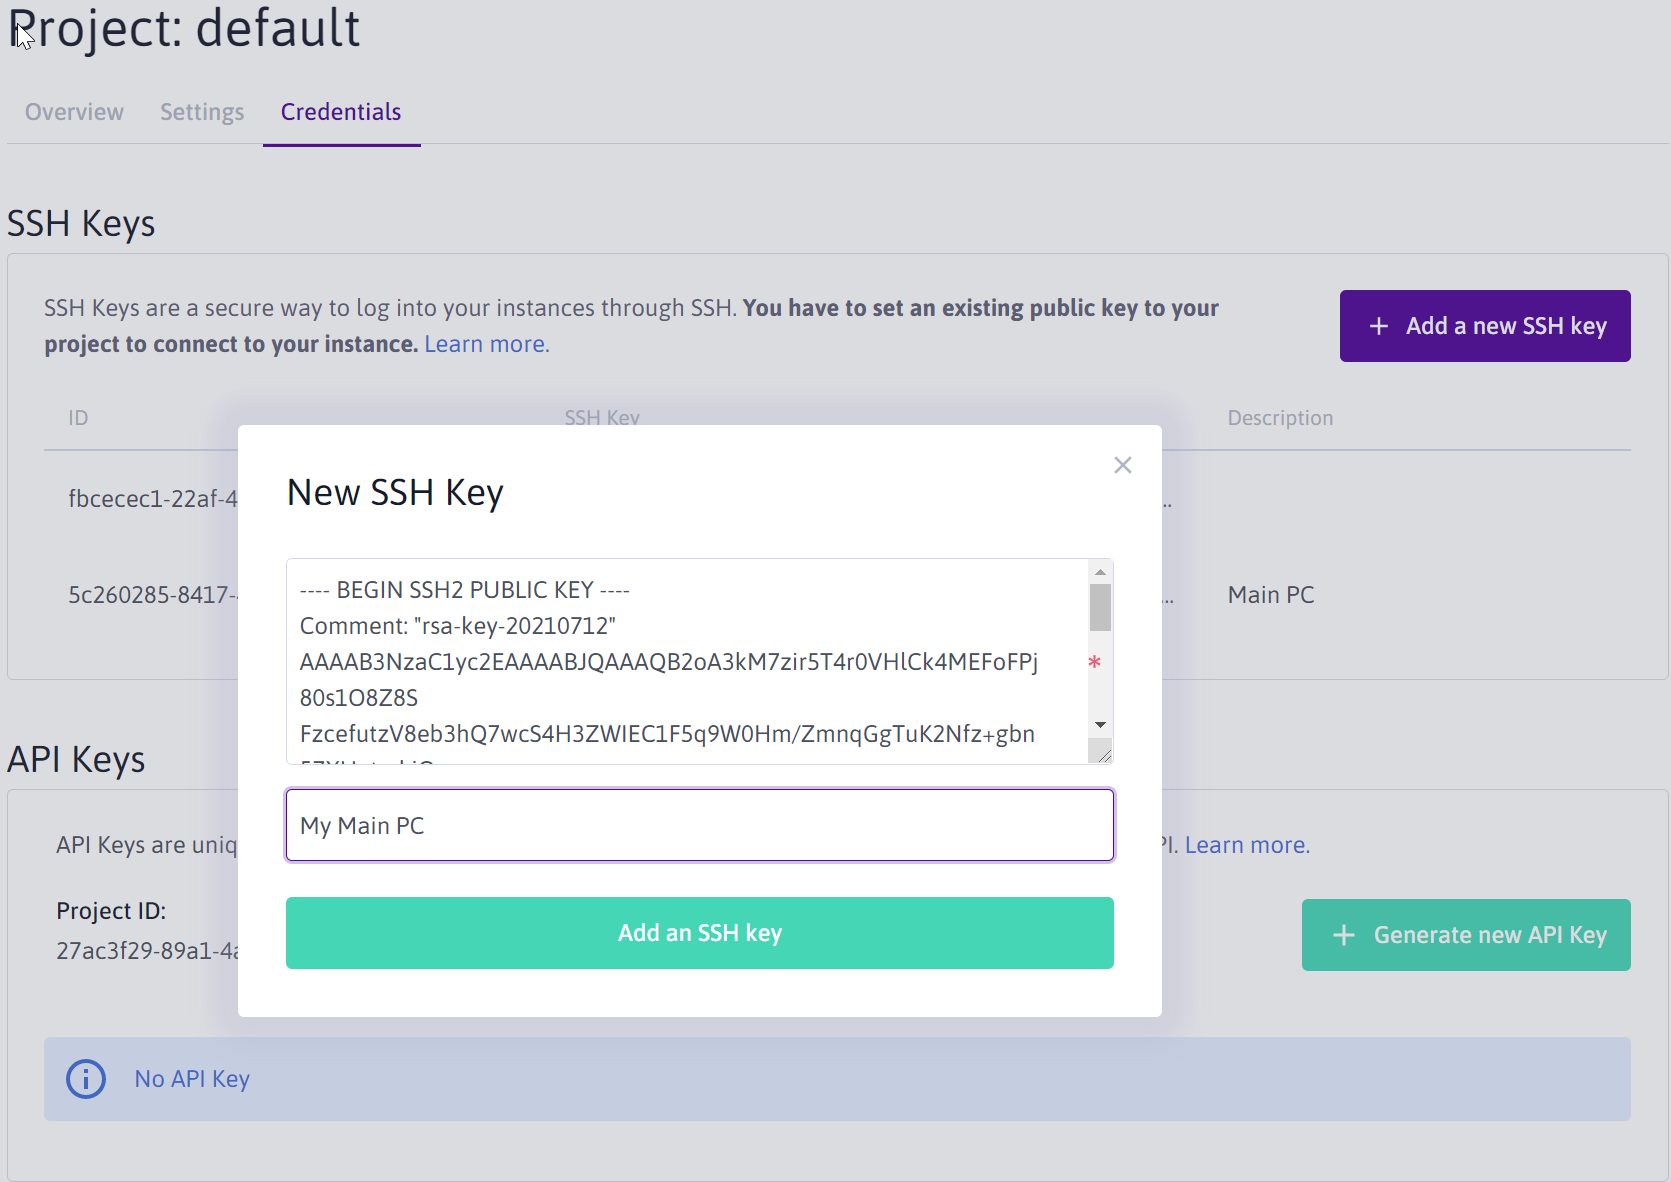
Now lets add our SSH key to the Scaleway Console so it can be used while creating our server.
Head over to Profile->Credentials in Scaleway Console (or click below link).
Click Add a New SSH Key and paste the contents of the Public Key we generated and saved earlier (you can open that file in Notepad to copy its content).
Give your SSH Credential a name and add it.
SSH part all done. Let's move towards creating our instance.
- Click on Instances on your left sidebar, under Compute.
- Create an Instance.
- Change Availability Zone to Amsterdam (Stardust, their cheapest instance type is only available there at present).
- Choose Ubuntu 20.04 as OS/Instance Image.
- Select Stardust in Instance Type.
- Enter name of your Instance and relevant tags (OPTIONAL).
- Make sure the SSH key we added earlier is shown here.
- Make sure the ESTIMATED COST for 1 Month shows below 2 Euro (which includes a public IP).
- Create a new instance.
Congratulations, we have our Linux/Ubuntu server created now. Time to move to next step, connecting to it and setting it up
Connect to our server instance and Set it up
You can use any SSH client of your choice to connect to your server (Putty being most popular), we will use MobaXTerm which is our favorite (link at top reference box).
- Download, install and Open MobaXTerm.
- Click Sessions tab, enter your server's public IP (copy it from the Console) in Remote Host, enter root as username.
- Click Advanced SSH settings tab below. Check mark Use private key.
- Click the browse button and select the previously saved SSH Private Key (OPENSSH).
- Click OK to save your server's profile and it should connect automatically.
Once connected, lets do some initial setup of our server.
From here onwards, you can just keep copy-pasting the server commands from this post in your MobaXTerm (shift + insert or right click in it to paste the command).
# Update Server Repos
apt update
# Install Zip/Unzip and VNStat for bandwidth monitoring and iftop for traffic
apt install -y zip unzip vnstat iftop
!! (OPTIONAL FOR YOU) !!
Make a sub-directory in /home (home directory) to download and unzip our backend service's code
cd /home
mkdir rpg
cd rpg
# Download
wget "https://github.com/insthync/rpg-php-service/archive/refs/tags/1.18.zip"
# Unzip files and move them
unzip 1.18.zip
ls
# Move all files from rpg-php-service folder to current folder
mv rpg-php-service/* ./
Install and Setup Nginx webserver and PHP
Let's install Nginx Webserver and PHP and some of its modules
apt install -y nginx php-fpm php-mbstring php-curl php-intl php-xml php-json php-mysqlnd php-mysql
phpenmod mbstring
Configure Nginx Webserver to serve PHP/HTML files on our server's Public IP from our backend's directory (/home/rpg)
# If asked which editor to use, choose nano
nano /etc/nginx/sites-enabled/default
Delete everything in that file, replace it with below content (copy-paste it) and press Ctrl + W and Enter to save the file changes
server {
	listen 80 default_server;

    # The directory from where to serve your code/content
    root /home/rpg;

    server_name _;
    index index.html index.php;

    client_max_body_size 100M;
    client_header_timeout 3000;
    client_body_timeout 3000;
    fastcgi_read_timeout 3000;
    fastcgi_buffers 8 128k;
    fastcgi_buffer_size 128k;


    location / {
    	try_files $uri $uri/ /index.php;
    }

    location ~ \.php$ {
    	#Uncomment below line if nginx reports fastcgi-php.conf missing
        #include fastcgi_params;
        #Comment below line if using above, should only use one of them
    	include snippets/fastcgi-php.conf;
        fastcgi_pass unix:/var/run/php/php7.4-fpm.sock;
    }

}
Press Ctrl + W to save the file.
Run below commands to test your nginx changes (conf file) and restart the webserver.
#This checks that your nginx conf is all good, if so, restart the nginx server
nginx -t
service nginx restart
Install and Setup MySQL Database Server
apt update
apt install software-properties-common -y
apt install mariadb-server -y
MySQL (mariadb) is now installed, lets run its post-installation security script
mysql_secure_installation- Press enter when asked for root password as initially its blank
- Press Y and enter to change root password, enter your new password and press enter to save
- Keep pressing Y to everything else
Let's login to MySQL to create our Database and assign it a user to access it
mysql -u rootPlease note that below are normal SQL queries to create a database, create a user with password and then assign privileges on that database to that user
create database rpgDB;
CREATE USER 'rpg_user'@'%' IDENTIFIED BY 'passwordhere';
GRANT ALL ON rpgDB.* TO 'rpg_user'@'%';
FLUSH PRIVILEGES;
QUIT;
Then you can use the above created database and its user info in the configuration file of your backend service (shown in video, skipped here).
(OPTIONAL) Install PHPMYADMIN to manage your database
PHPMYADMIN is a well known GUI-based database management tool, but we personally recommend using a desktop-client based management tool like HeidiSQL (shown in video).
Nevertheless, here is how you install PHPMYADMIN, to hide and secure our phpmyadmin's access, please change hiddenmysql to whatever directory name you want.
apt install -y phpmyadmin
ln -s /usr/share/phpmyadmin /home/rpg/hiddenmysql
Your PHPMYADMIN will be accessible at http://YOURPUBLICIP/hiddenmysql
If you get a count or count-related error in phpmyadmin, please follow these steps

*Please do restart the services using below step before trying to access your backend code or even phpmyadmin
Let's do a final restart of all our services
service nginx restart
service php7.4-fpm restart
service mysql restart
All done, enjoy.